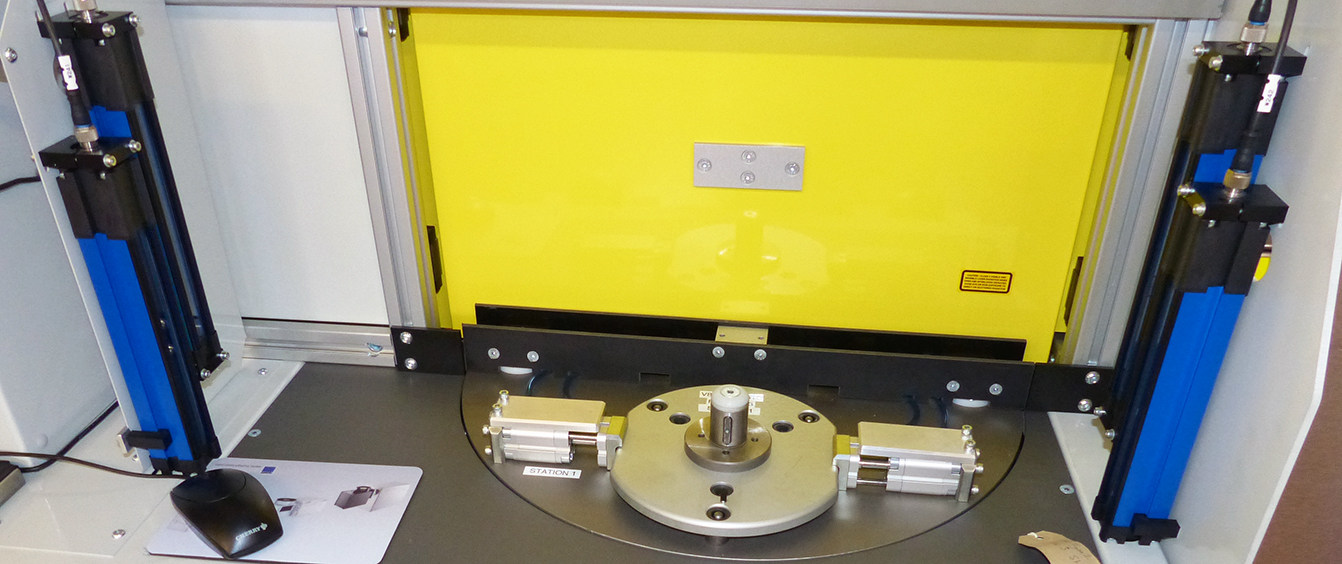
Automated laser marking and verification system for automotive parts
Client: Global Heavy Automotive Parts Supplier
Part: Heavy Automotive Transmission Circular Part
Machine supplied: Laser marking and verification system
Marking Type: Alphanumeric + 2D Datamatrix Barcode + Timing Marks
Configuration: 2-Position Indexing Table for Simultaneous Load/Mark Operations
The Challenge
A global heavy automotive parts supplier needed automated laser marking with verification for transmission components. The marking requirements included:
- Permanent traceability marks on cylindrical parts (circumferential marking)
- Alphanumeric text (part numbers, serial numbers, technical specifications)
- Grade A 2D Datamatrix barcodes for automated scanning
- Precise timing marks for assembly alignment
- Marking across varying diameters on the same part
- 100% verification ensuring all marks are readable before parts leave the station
- Multi-variant capability for different transmission components without extensive changeover
- Operator safety during manual loading while maintaining production throughput
Manual marking methods (stamping, dot peen) couldn’t achieve the mark quality required for automated barcode scanning. The circular geometry required coordinated rotation during marking, and verification needed to occur within the production cycle time to prevent defective marks from reaching assembly.
The Solution
TQC designed a dual-station laser marking system with integrated vision verification. A 2-position indexing table allows simultaneous operations – while the operator loads/unloads at one station, the laser marks and verifies at the other station. The system coordinates part rotation with laser output using encoder feedback, enabling continuous circumferential marking across varying diameters. Automatic focal length adjustment maintains mark quality as diameter changes. Line scan vision with OCR verifies all marks including Grade A Datamatrix readability before the part advances
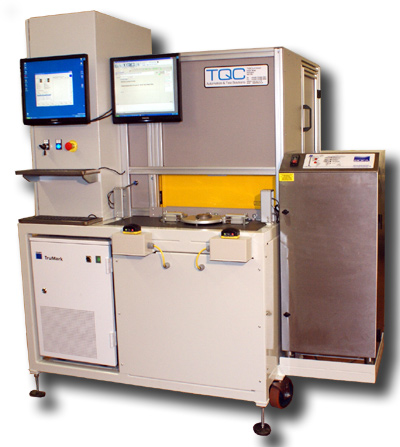
Technical Overview – Laser Marking System
2-Position Indexing Table
Dual-Station Architecture: The indexing table provides two positions that alternate functions:
Station 1 (Load/Unload): Operator access station where parts are manually loaded into tooling and completed parts are removed. This station is outside the laser enclosure for safe operator access.
Station 2 (Mark/Verify): Automated marking station within the laser safety enclosure where laser marking and vision verification occur.
Indexing Operation: After the operator loads a part and initiates the cycle with a 2-hand start button:
- Table rotates 180°, moving loaded part to marking station
- Previously marked part moves to load/unload station
- Operator unloads marked part and loads next part while marking occurs
- Cycle repeats
Throughput Advantage: The dual-station configuration eliminates idle time. Manual load/unload and automated mark/verify occur simultaneously, effectively doubling throughput compared to single-station systems.
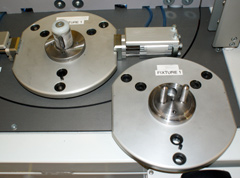
Interchangeable Tooling
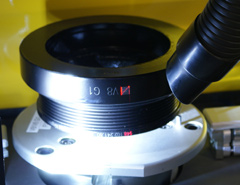
Multi-Variant Capability: Different transmission components require different tooling. The system accommodates variants through interchangeable tooling sets:
Tooling Functions:
- Part location and datum establishment
- Support during rotation (prevents deflection)
- Interface with rotary mechanism for marking
- Repeatability for consistent marking position
Tooling Changeover: Operators swap tooling sets when changing production between part variants. Tooling is designed for quick release and positive location, minimizing changeover time (typically 5-10 minutes).
Part Variant Range: Tooling accommodates different transmission component sizes, shapes, and marking requirements without modifying the laser system or indexing table.
Rotary Laser Marking System with Encoder Feedback
Circumferential Marking Challenge: Marking around the circumference of a circular part requires synchronized rotation and laser output. The system achieves this through:
Rotary Axis with Encoder: A servo-driven rotary mechanism engages with the tooling at the marking station, lifting and rotating the part. An encoder provides real-time angular position feedback.
Position Synchronization: The laser controller interfaces with the rotary encoder, coordinating laser output with part rotation. As the part rotates, the laser “paints” the mark onto the moving surface.
Segmented Marking: The circumferential mark is created in segments:
- Part rotates to starting position
- Laser marks first segment while part rotates
- Part indexes to next segment position
- Laser marks next segment
- Process repeats until full circumference is marked
Encoder Accuracy: High-resolution encoder ensures marks align precisely between segments, creating continuous text and barcodes around the circumference.
Automatic Focal Length Adjustment
Varying Diameter Challenge: Marking across different diameters on the same part (e.g., a stepped shaft) requires the laser focal point to remain at the correct distance from the surface.
Automatic Focus Adjustment: The laser head includes a Z-axis (vertical) servo that adjusts focal length during marking:
- Part diameter data is programmed for each marking location
- As the laser moves to different radii, Z-axis adjusts automatically
- Focal point remains optimal throughout the marking process
Benefit: Maintains consistent mark quality (depth, width, contrast) across all diameters. Without automatic focus, marks on different diameters would have inconsistent quality.
Laser Marking System Capabilities
Alphanumeric Text: Part numbers, serial numbers, batch codes, date codes, technical specifications. Font size and style are programmable.
2D Datamatrix Barcodes (DMX Codes): High-density 2D barcodes store significant data in small areas:
- Part number
- Serial number
- Manufacturing date
- Assembly instructions
- Traceability codes
Grade A Datamatrix: The system achieves Grade A barcode quality (highest readability grade per ISO/IEC 15415). Grade A ensures reliable automated scanning throughout the part’s lifetime, even after surface wear or contamination.
Timing Marks: Precise alignment marks used during assembly. These marks guide automated assembly systems or operators, ensuring components install at the correct rotational orientation.
Graphics: Logos, symbols, warnings, or custom graphics as required.
Line Scan Vision Verification
Verification Requirement: Every mark must be verified as readable before the part advances. Defective marks (incomplete, distorted, incorrect data) caught at this stage prevent assembly errors downstream.
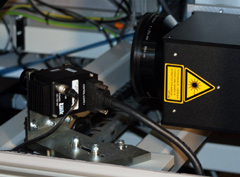
Line Scan Camera Technology: A line scan camera captures images as the part rotates:
How Line Scan Works:
- Camera captures one vertical line of pixels at high resolution
- Part rotates beneath the camera
- Multiple lines are assembled into a complete 2D image
- Encoder provides position data to correlate camera lines with part rotation
Offset Verification Position: The vision camera is positioned at an angular offset from the laser. After marking completes, the part continues rotating to the camera position for verification.
OCR (Optical Character Recognition): Vision software reads alphanumeric text and compares to expected data. Mismatches trigger alarms and reject the part.
Datamatrix Verification: Vision software grades the Datamatrix barcode quality. Only Grade A or B marks pass (depending on customer specification). The system verifies:
- All cells present and correctly formed
- Adequate contrast
- Correct data content
- No distortion or damage
Automatic Reject: If verification fails, the system locks the indexing table and alerts the operator. The defective part must be removed and the issue resolved before production continues.
Integrated Extraction System
Fume and Dust Generation: Laser marking vaporizes surface material, creating fumes and dust particulates. These must be extracted for:
- Operator health and safety
- Mark quality (debris can interfere with laser beam)
- Laser optics protection (contamination reduces performance)
Extraction Integration: The system includes:
- Extraction nozzles positioned near marking points
- Ducting to external extraction unit or internal filtration
- Airflow sufficient to capture fumes without disturbing part alignment
Safety Features – Laser Marking System
Full Laser Standard Guarding: The marking station is fully enclosed to prevent laser exposure. Enclosure meets Class 1 laser safety requirements (operator protection without special eyewear).
Safety Viewing Window: Operators can observe the marking process through a safety-rated viewing window that blocks harmful laser wavelengths while allowing visible light transmission.
Removable Access Panels: Panels allow access for maintenance, tooling changes, and part recovery. Interlocks disable laser when panels open.
2-Hand Start Button: Operator must press two buttons simultaneously to initiate the index cycle. This ensures both hands are clear of the indexing table during rotation, preventing pinch injuries.
E-Stop: Emergency stop buttons immediately halt all motion and disable the laser.
PC Control System – Laser Marking System
Operator Interface: Touchscreen PC provides:
- Mark data entry (part numbers, serial numbers, dates)
- Part variant selection (recalls marking programs and parameters)
- Production count monitoring
- Verification status display
- Error diagnostics
Mark Programming: Keyboard and mouse allow:
- Mark layout design
- Text and barcode positioning
- Timing mark location
- Focal length parameters for different diameters
- Verification acceptance criteria
Data Logging: System records:
- All marked parts with serial numbers and timestamps
- Verification pass/fail results
- Reject reasons (OCR failure, barcode grade, incomplete marks)
- Production counts by part variant
Mobile Configuration
Mounted on Wheels: The system is mobile, allowing:
- Easy integration into existing production cells
- Repositioning as production layout changes
- Movement between production lines as marking needs shift
- Installation without floor fixation
Integration Flexibility: Mobile configuration enables connection to:
- Pallet transfer systems (automated part delivery)
- Conveyor systems
- Robotic cells
- Manual assembly stations
System Specifications – Laser Marking System
- Stations: 2-position indexing table (simultaneous load/unload and mark/verify)
- Loading: Manual with 2-hand start button
- Marking Technology: Fiber laser (typical for metal marking)
- Marking Content: Alphanumeric text, 2D Datamatrix barcodes, timing marks, graphics
- Barcode Quality: Grade A (ISO/IEC 15415)
- Rotary Axis: Servo-driven with encoder feedback for circumferential marking
- Focal Length: Automatic Z-axis adjustment for varying diameters
- Verification: Line scan camera with OCR and barcode grading
- Extraction: Integrated fume and dust extraction
- Control: PC with touchscreen, keyboard, and mouse
- Safety: Class 1 enclosure, safety viewing window, 2-hand start, interlocked access panels
- Tooling: Interchangeable for multiple part variants
- Mobility: Mounted on wheels for flexible installation
- Application: Heavy automotive transmission components (circular parts)
Key Features
Dual-Station Indexing: Simultaneous load/unload and mark/verify operations double throughput compared to single-station systems.
Circumferential Marking: Rotary axis with encoder feedback enables continuous marking around circular parts.
Automatic Focal Adjustment: Z-axis servo maintains optimal focus across varying diameters on the same part.
Grade A Datamatrix: Achieves highest barcode quality for reliable automated scanning throughout part lifetime.
100% Verification: Line scan vision with OCR verifies all marks before parts advance, preventing defective marks from reaching assembly.
Multi-Variant Flexibility: Interchangeable tooling accommodates different transmission components with quick changeover.
Integrated Extraction: Fume and dust removal protects operators, mark quality, and laser optics.
Mobile Configuration: Wheel-mounted for flexible integration into production cells, pallet systems, or conveyor lines.
Results
The automated laser marking and verification system provides permanent traceability for heavy automotive transmission components. The dual-station indexing table maintains production throughput by allowing simultaneous manual loading and automated marking operations.
Encoder-synchronized rotary marking creates continuous circumferential marks including alphanumeric text, Grade A Datamatrix barcodes, and precise timing marks. Automatic focal length adjustment maintains consistent mark quality across varying diameters on stepped components.
Line scan vision verification with OCR ensures 100% mark readability before parts leave the station. Verification of Datamatrix grade prevents unreadable barcodes from reaching assembly, where scanning failures would stop production.
Interchangeable tooling supports multiple transmission component variants without system modification. The mobile configuration on wheels enables flexible integration into changing production layouts and connection to pallet transfer systems or automated material handling.
To view a printer friendly format please click below
Laser Marking and Verification System
Related Capabilities
This project demonstrates TQC‘s expertise in:
- Laser marking system integration
- 2-position indexing tables
- Rotary marking with encoder synchronization
- Automatic focal length adjustment
- Line scan vision systems
- OCR and Datamatrix verification
- Grade A barcode marking
- Interchangeable tooling design
- Laser safety enclosure design
- PC-based control and data logging
- Automotive traceability systems

